manual drip
Manual drip coffee offers a personalized brewing experience, allowing control over each variable for a superior cup. It’s a ritual enjoyed by coffee enthusiasts!
Unlike automatic machines, manual drip emphasizes precision and artistry, unlocking nuanced flavors from your favorite coffee beans. This method is truly rewarding.
This brewing style provides a hands-on approach, letting you savor the aroma and process, resulting in a richer, more satisfying coffee experience.
What is Manual Drip Coffee?
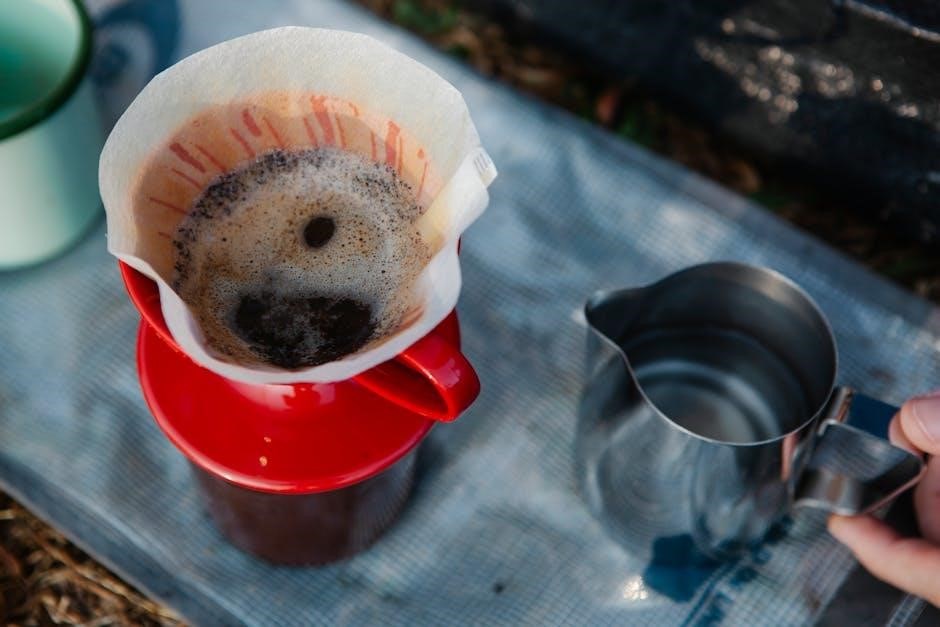
Manual drip coffee is a brewing method where hot water is poured by hand over coffee grounds held within a filter. This contrasts with automatic machines that handle the process independently. It’s a deliberate, controlled technique, often utilizing tools like a Hario V60 or Kalita Wave.
The process involves slowly saturating the grounds, allowing for optimal extraction of flavors and aromas. This hands-on approach gives the brewer complete control over variables like water temperature, pour speed, and saturation. It’s a favored method among coffee aficionados seeking a customized and flavorful brew, offering a unique sensory experience.
Why Choose Manual Drip Over Automatic?
Choosing manual drip over automatic brewing grants unparalleled control over the final cup. Unlike automated systems, you dictate water temperature, pour rate, and saturation, influencing flavor extraction. This precision allows for experimentation and customization to perfectly match your palate.
Manual drip also fosters a more mindful coffee ritual, engaging your senses and appreciating the brewing process. It’s a slower, more deliberate method, resulting in a richer, more nuanced flavor profile often lost in the convenience of automatic machines. It’s about the experience!
Essential Equipment for Manual Drip
Successful manual drip brewing requires specific tools: a dripper, filters, a gooseneck kettle, and a grinder. Quality equipment elevates the coffee experience!
Manual Drip Coffee Maker (e.g., Hario V60, Kalita Wave)
Manual drip coffee makers are the heart of this brewing method, with popular choices like the Hario V60 and Kalita Wave. The Hario V60, known for its conical shape, promotes a fast, clean brew, demanding precise technique.
Conversely, the Kalita Wave features a flat-bottom design and wave filters, offering more forgiveness and consistent extraction. Both drippers are typically made of glass, ceramic, or plastic, each impacting heat retention. Choosing depends on your skill level and desired control – explore to find your perfect match!
Filters: Paper vs. Metal
Filters significantly impact the final coffee flavor in manual drip brewing. Paper filters, the most common choice, trap oils and sediment, resulting in a cleaner, brighter cup. They come bleached or unbleached; rinsing bleached filters is recommended to remove any papery taste.
Metal filters, reusable and eco-friendly, allow more oils and fines to pass through, creating a fuller-bodied, richer brew. However, they require thorough cleaning to prevent buildup. Your filter choice depends on your preference for clarity versus body in your coffee.
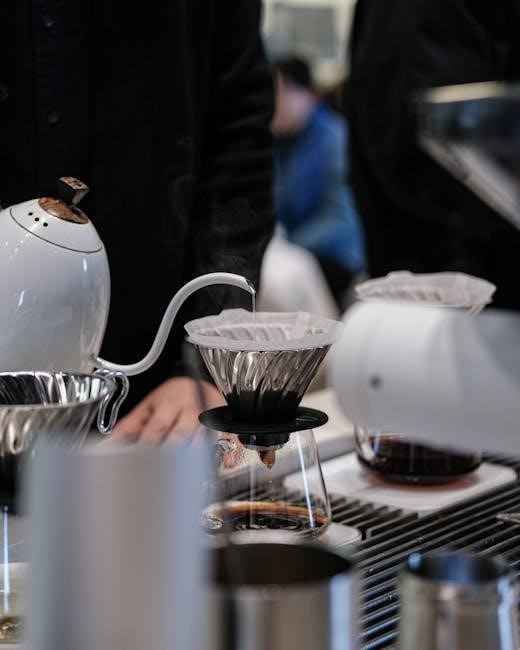
Gooseneck Kettle for Precise Pouring

A gooseneck kettle is crucial for manual drip coffee, offering unparalleled control over water flow. Its elongated, curved spout allows for a slow, steady pour, essential for even saturation of the coffee grounds. This precision minimizes channeling and ensures optimal extraction.
Unlike standard kettles, a gooseneck enables you to dictate the pour rate and pattern, vital for techniques like blooming and consistent brewing. Investing in a quality gooseneck kettle elevates your manual drip experience, leading to a more flavorful and balanced cup.
The Coffee Bean: Selection and Grind
Coffee bean quality and grind size significantly impact manual drip brewing. Freshly roasted, whole beans are best, ground immediately before brewing for optimal flavor!
Choosing the right bean and achieving a consistent grind are fundamental to unlocking the full potential of your manual drip coffee.
Choosing the Right Coffee Beans
For manual drip coffee, selecting high-quality, freshly roasted whole beans is paramount. Arabica beans generally offer brighter acidity and complex flavors, ideal for showcasing the nuances of this brewing method. Consider the origin; Ethiopian beans provide floral and citrus notes, while Sumatran beans deliver earthy, full-bodied profiles.
Experiment with different roast levels – light roasts highlight origin characteristics, medium roasts balance flavor and body, and dark roasts offer boldness. Always purchase whole bean coffee and grind it just before brewing to preserve volatile aromatics and maximize flavor extraction.
Grind Size: Finding the Sweet Spot
For manual drip coffee, achieving the correct grind size is crucial for optimal extraction. A medium-fine grind, resembling coarse sand, is generally recommended. If the grind is too fine, it can lead to over-extraction, resulting in bitter flavors and a slow drip. Conversely, a too-coarse grind causes under-extraction, yielding sour, weak coffee.
Experimentation is key! Adjust your grind slightly finer or coarser based on the brewing time and taste. A proper grind ensures balanced flavor, allowing the water to effectively extract the desired compounds from the coffee grounds.
The Brewing Process: A Step-by-Step Guide
Manual drip brewing involves heating water, preparing grounds and filter, blooming the coffee, pouring slowly, and timing extraction for a perfect cup!
Step 1: Heating the Water
Heating the water is foundational to manual drip coffee. Aim for a temperature between 195-205°F (90-96°C) – crucial for optimal extraction. A gooseneck kettle provides precise temperature control and a steady pour.
Avoid boiling water, as it can scorch the coffee grounds, leading to a bitter taste. If you lack a temperature-controlled kettle, bring water to a boil and let it sit for about 30 seconds before pouring. Consistent water temperature ensures a balanced and flavorful brew, unlocking the coffee’s full potential.
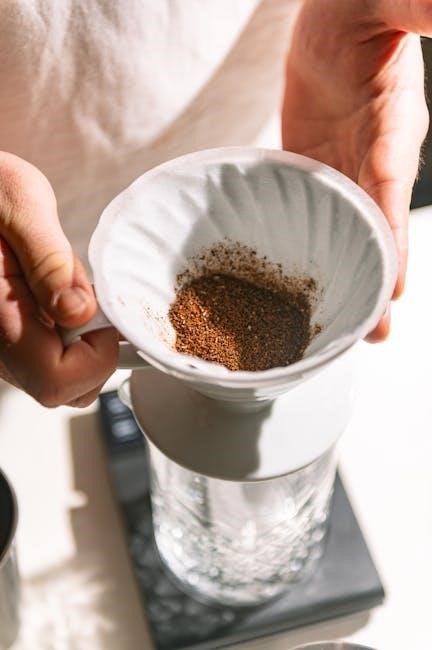
Step 2: Preparing the Filter and Coffee Grounds
Begin by placing your chosen filter – paper or metal – into the manual drip device. If using a paper filter, rinse it thoroughly with hot water; this eliminates paper taste and preheats the brewer. Discard the rinse water.
Next, measure your coffee grounds. A common ratio is 1:16 (coffee to water). Grind your beans immediately before brewing for maximum freshness. Ensure even saturation during brewing by distributing the grounds evenly within the filter. Proper preparation sets the stage for a delicious cup!
Step 3: The Bloom – Pre-Infusion
The “bloom” is crucial for optimal flavor extraction in manual drip. Gently pour roughly twice the weight of the coffee grounds in hot water over them, ensuring all grounds are saturated. This initial pour releases trapped carbon dioxide.
Allow the coffee to “bloom” for 30-45 seconds. You’ll observe bubbling – this is the CO2 escaping. This pre-infusion step degasses the coffee, preparing it for even extraction during the main pour, resulting in a cleaner, brighter cup.
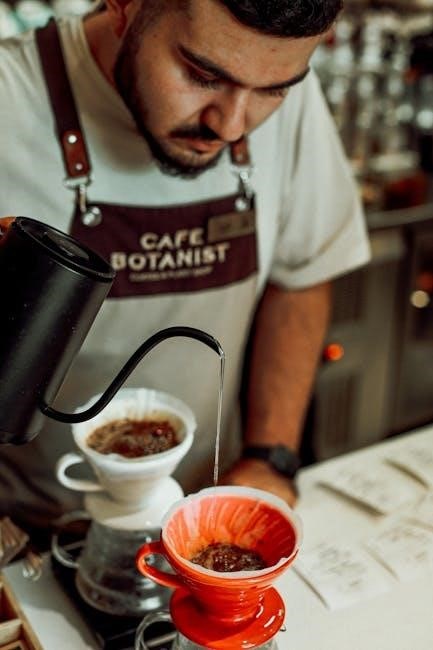
Step 4: The Main Pour – Controlled Water Flow
After the bloom, begin the main pour with a slow, steady, and circular motion. Maintain a consistent water level, avoiding pouring directly onto the filter paper. A gooseneck kettle is essential for precise control over the water flow rate.
Aim for a gentle, even saturation of the coffee bed. The goal is to extract flavors uniformly. Avoid disturbing the grounds excessively. Continue pouring until you reach your desired coffee volume, maintaining a consistent pace throughout the brewing process.
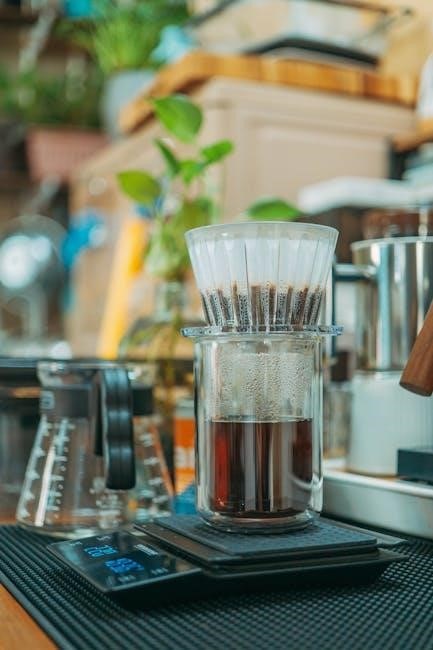
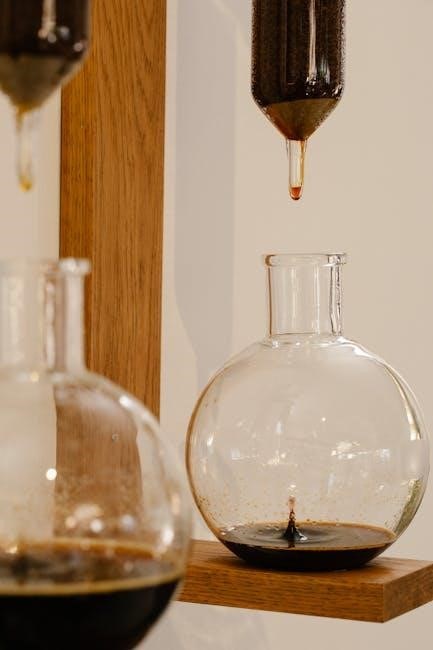
Step 5: Brewing Time and Extraction
Generally, a manual drip brew should take between 4 to 8 minutes, according to the SCAA. Monitor the dripping speed; too fast indicates a coarse grind, while too slow suggests a fine grind. Adjust accordingly for optimal extraction.
Extraction is key – under-extraction results in sour coffee, while over-extraction leads to bitterness. Observe the color of the brew; a pale color suggests under-extraction, and a dark color indicates over-extraction. Fine-tune your technique for a balanced, flavorful cup.

Understanding the “Bloom” Phase
The “bloom” is the initial coffee and water interaction, releasing trapped CO2. This pre-infusion stage is crucial for even extraction and flavor development!
The Science Behind the Bloom
During roasting, coffee beans accumulate carbon dioxide. When hot water is introduced, it rapidly degasses the grounds – this is the bloom. This process allows for optimal saturation, preparing the coffee for even extraction.
Without the bloom, the water would struggle to fully wet the grounds, leading to uneven extraction and potentially a sour or underdeveloped flavor. The visual bubbling indicates CO2 escaping, signifying a healthy bloom.
Essentially, the bloom is a vital step in unlocking the full potential of your coffee, ensuring a balanced and flavorful brew through proper degassing and saturation.
Visual Cues of a Proper Bloom
A proper bloom presents as a vigorous bubbling and expansion of the coffee grounds, resembling a frothy surface. This indicates active degassing and thorough saturation. The grounds should swell noticeably, creating a uniform bed.
If bubbling is minimal or absent, it suggests stale coffee or insufficient water temperature; Conversely, excessive bubbling might indicate an overly coarse grind. Observe the bloom for roughly 30-45 seconds.
A well-executed bloom results in evenly saturated grounds, ready for the main pour, promising a balanced and flavorful coffee extraction. It’s a key indicator of brewing success!
Troubleshooting Common Issues
Manual drip brewing can present challenges! Bitter coffee often results from over-extraction, while sourness indicates under-extraction. Adjust grind size and brew time accordingly.
Coffee Tastes Bitter
Coffee tasting bitter during manual drip brewing usually signals over-extraction. This happens when hot water dissolves too many compounds from the coffee grounds. Several factors contribute to this issue.
Firstly, the grind size might be too fine, increasing the surface area exposed to water. Secondly, water temperature could be excessively high. Lastly, brewing time may be too long, leading to unwanted extraction.
To remedy this, try a coarser grind, slightly cooler water, or shorten the brewing duration. Experimenting with these variables will help achieve a balanced, less bitter cup.
Coffee Tastes Sour
A sour taste in manual drip coffee typically indicates under-extraction. This means the water hasn’t adequately dissolved the desirable compounds from the coffee grounds, leaving behind acidic flavors. Several factors can cause this issue during the brewing process.
A grind that is too coarse is a common culprit, limiting water contact. Insufficient water temperature or too short a brewing time can also lead to under-extraction.
To correct this, try a finer grind, hotter water (within the ideal range), or extend the brewing time slightly.
Brewing Time Too Slow/Fast
Manual drip brewing time is crucial; deviations impact flavor. A brew that’s too slow often results from a grind that’s excessively fine, creating too much resistance to water flow. Conversely, a fast brew suggests a grind that’s too coarse.
Slow brewing can lead to over-extraction and bitterness, while a rapid brew causes under-extraction and sourness. Adjusting the grind size is the primary solution.
Consider also the filter type – some flow slower than others. Aim for a brewing time between 4 and 8 minutes, as recommended by the SCAA.
Cleaning and Maintenance
Manual drip equipment requires regular cleaning for optimal performance and flavor. Daily rinsing and periodic descaling prevent buildup and ensure consistently delicious coffee!
Proper maintenance extends the lifespan of your brewer and preserves the quality of each brew. It’s a simple investment.
Daily Cleaning Routine
Manual drip coffee makers benefit from a quick daily clean. Immediately after brewing, discard the used coffee grounds and rinse the filter holder thoroughly with warm water. Ensure no residual grounds remain, as they can impart bitterness to subsequent brews;
Wash the carafe with warm, soapy water, paying attention to any coffee stains. Rinse completely to remove all soap residue. Wipe down the exterior of the brewer with a damp cloth. This simple routine prevents buildup and maintains optimal flavor.
Allow all components to air dry completely before reassembling. A consistent daily cleaning routine is key to enjoying consistently delicious coffee!
Descaling Your Equipment
Over time, mineral deposits from water can accumulate in your manual drip coffee maker, affecting performance and flavor. Descaling removes these deposits. Use a descaling solution specifically designed for coffee makers, or a mixture of white vinegar and water.
Run the solution through a full brewing cycle, then rinse thoroughly by running several cycles with fresh water. This ensures no residual descaling agent remains. Repeat this process every 1-3 months, depending on water hardness.
Regular descaling extends the life of your brewer and guarantees consistently excellent coffee!
Advanced Techniques
Manual drip mastery involves refining ratios and water temperatures to unlock unique flavor profiles. Experimentation is key to personalized brewing!
Adjusting these variables allows for precise control, enhancing sweetness, acidity, or body in your coffee, elevating the experience.
Ratio Adjustments for Flavor Control
Manual drip coffee flavor is profoundly impacted by the coffee-to-water ratio. A standard starting point is 1:16 (1 gram of coffee to 16 grams of water), but subtle shifts yield dramatic results.
Decreasing the water (e.g., 1:15 or 1:14) intensifies the coffee’s strength and body, potentially increasing bitterness if over-extracted. Conversely, increasing water (1:17 or 1:18) creates a lighter, brighter cup, emphasizing acidity.
Experimenting with these ratios allows you to tailor the brew to your bean’s characteristics and personal preference. Careful adjustments unlock the full potential of each coffee!
Water Temperature Experimentation
Manual drip coffee brewing is significantly influenced by water temperature. Generally, 195-205°F (90-96°C) is recommended, but optimal temperature varies with the coffee bean.
Lower temperatures (around 195°F) can highlight acidity and delicate floral notes, ideal for lighter-roasted beans. Higher temperatures (closer to 205°F) extract more body and sweetness, suiting darker roasts.
Experimenting within this range allows you to fine-tune extraction, avoiding under-extraction (sourness) or over-extraction (bitterness). Precise temperature control unlocks the bean’s full flavor profile!